Hardware Hacking Diaries 1: Arcane Thermometer
Published on in Bristol, UK.
A little while ago, I had an idea for an exciting side-project that would actually be useful in everyday life. The only problem was: There’s no way of actually doing what I wanted to do without building a thing. With actual, physical hardware.
Realising that the thing I wanted to build is a bit more involved than the Hello World equivalent of electronics, I turned to the internet to find out the easiest way to get started with hardware hacking. The Sparkfun Inventor’s Kit was one of the most popular starting kits. It includes a range of small hardware bits: LEDs, buttons, transistors, sensors, and an Arduino. What sets it apart from similar kits is the included guide with 16 different example projects. It also claims You don’t need any previous programming or electronics experience to use this kit.
Bold claim. Promising, but bold. While my programming skills aren’t completely awful, my electronics experience is—well—disappointing for an adult. Ask my exasperated middle school natural sciences teacher. I’m so sorry, Per Egil, I do wish I had paid more attention now, twelve years later. I hardly even know what a circuit is. How light switches even work remain a mystery. I still don’t know what grounding is, except it’s important.
My point is, I’m utterly terrible at electronics.
I’m one third through the booklet’s examples. So how has the Inventor’s Kit fared so far?
Each example comes with great diagrams and the code already provided. All you have to do to is read through the well-commented code and arrange components like the provided diagrams. It’s rather easy. I haven’t struggled with the software side of things yet, as it eases you into it gently. In terms of the electronics, at some points Sparkfun take great care to explain what you’re doing. Yet at others it falls down a bit by making some assumptions. e.g. voltage dividers are self-explanatory if you remember the difference between voltage and resistance. Well, most people probably do, but I’m a bit daft.
In SparkFun’s defense, there’s only so much you can fit in the booklet. Additionally, my daft Google searches often lead to far better explanations on their own site.
However, thanks to the plug-and-play nature of the examples, I’ve mostly powered through the examples instead of actually understanding what’s going on. When learning new things, I mostly make stuff work first and reverse-engineer it to learn what I actually did.
I figured I should try to change some examples to actually learn what’s going on. Fortunately, something recently triggered my curiosity. Example 7 showed you how to using a temperature sensor to log the temperature to the console. That’s boring—I log things to the console all day at my job. Most of the previous examples involved working with LEDs, so the natural extension was to make a functional thermometer with LEDs.
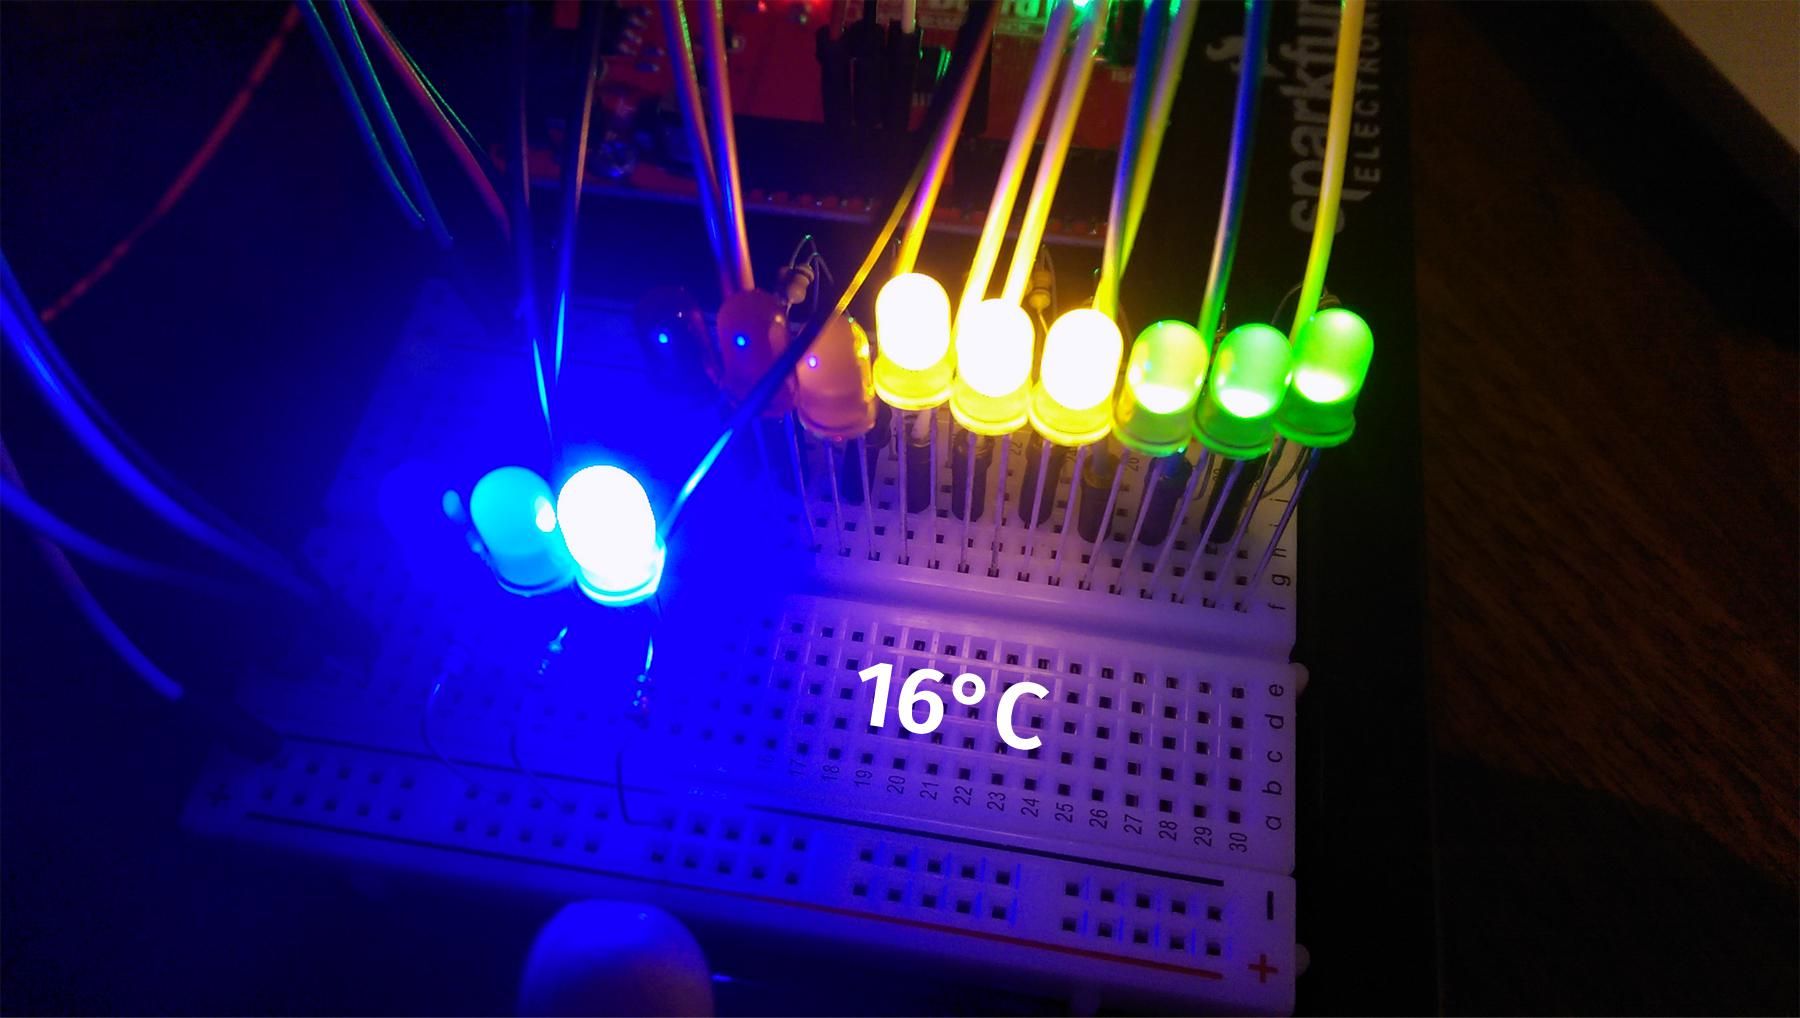
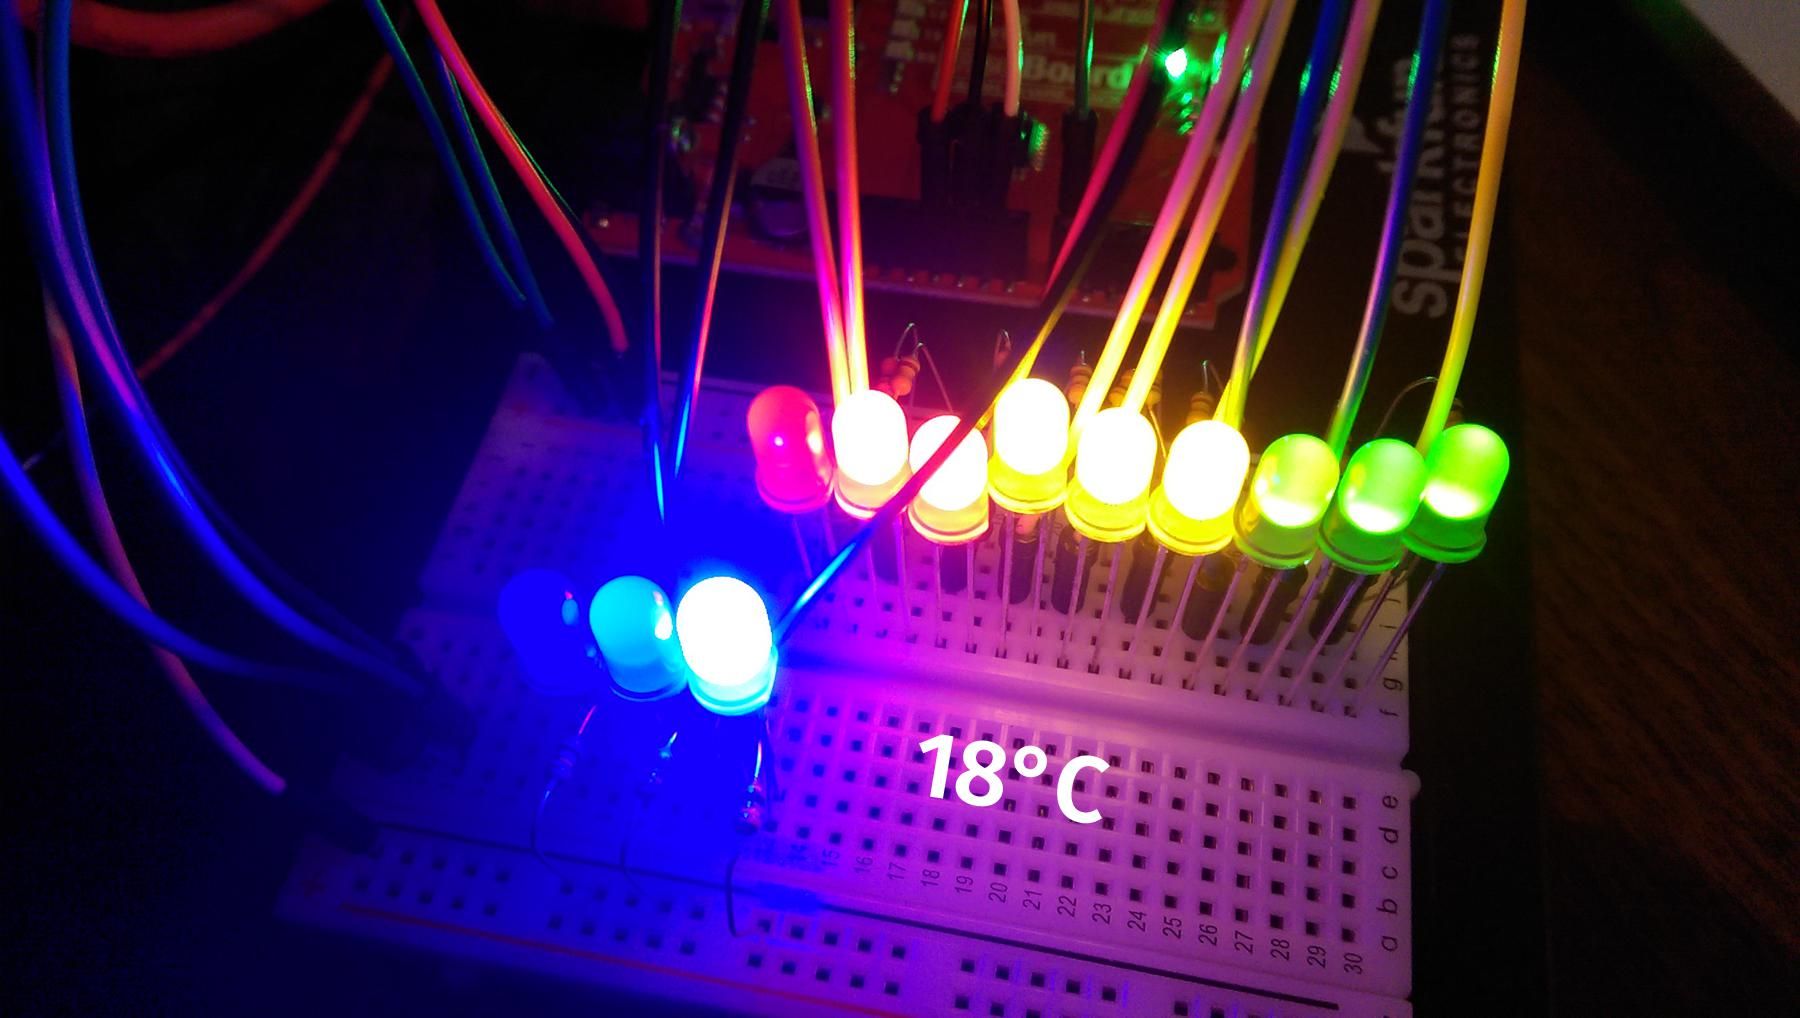
Only having 20 LEDs to work with, I couldn’t represent each degree by an LED. That would obviously restrict you from accurately representing the sweltering heat of British autumn. Instead, I decided to use separate LED areas for tens and ones. This would, theoretically, let me present a temperature range of -60 through +50 degrees. To keep things simpler, I implemented three LEDs for the tens-range; ending up at a range of 0 to 39 degrees.
A few hours later and I had my thermometer. Here’s what I learnt:
Hardware is tricky to debug.
At one point, when I attempted to turn all the LEDs off/on, one LED was consistently turned on. Turns out, if you’re using the serial port to pass data from the Arduino to the computer (for logging), you can’t rely on pins 0 and 1. It would have been useful if the guide mentioned this when first talking about the serial port. That being said, it was relieving that the universal software debugging strategy of remove everything still applied. In this case, I found this nugget when googling “serial port bug pin 1 arduino”.

It was satisfying to solve this bug, but I sure as hell felt stupid swapping five different jumper wires, transistors, and LEDs in case they were all somehow broken. Software controls the hardware, not vice-versa. In some cases the hardware is actually broken, but that’s a topic for another post.
Plan your hardware connections before building them
It’s easier to refactor code than to rebuild circuits. In my excitement to wire, I forgot that I needed room for thirteen resistors and LEDs, eighteen wires, and the temperature sensor itself.
I wound up having to take the entire thing apart. Twice. Spending two minutes up-front considering the layout of the breadboard and its connections would’ve saved me twenty minutes later.
Noise and fluctuation
Initially I tried sampling the temperature every 5 milliseconds or so (mostly because I wanted the demo video to update really quickly). This surfaced a problem. The analogue pin readings from the sensor tended to fluctuate a fair amount. This was more of an issue when the temperature wasn’t stable. While the LED disco that ensued from the value fluctuation was cool and all, it didn’t make for a very nice thermometer. Having researched this, I attempted to implement a smoothing algorithm to emulate a fairly stable reading. It wasn’t working very well, so I changed the sampling rate from 5ms to 250ms, and it did the trick.
The lesson from this: Don’t overengineer things.
In conclusion
Building a physical thing when you know next to nothing about electronics can be frustrating at times. Fewer debugging opportunities coupled with explanations that are sometimes skimmed over a bit too quickly, has led to a slightly frustrating experience at times.
However, actually building this has been incredibly satisfying. Learning new things is something I haven’t done for a while—having the end goal of a more advanced thing that I could use is a powerful motivator. Plus, I got to put my Arduino in the freezer for learning purposes.
So, here’s what I made: